As an Amazon Associate, I earn from qualifying purchases
Introduction
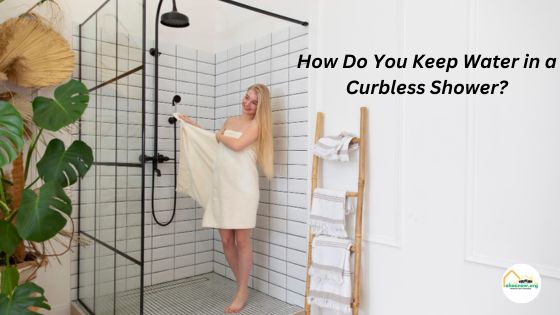
A curbless shower, also known as a walk-in shower or zero-threshold shower, is an increasingly popular choice for modern bathrooms. Its seamless and open design not only adds a touch of elegance to your space but also provides easy accessibility, making it an ideal option for people of all ages and abilities. However, one of the primary concerns with curbless showers is keeping water from flowing beyond the designated shower area. In this article, we will explore various effective methods to How Do You Keep Water in a Curbless Shower, ensuring a dry and safe bathroom environment.
Selecting the Right Shower Drain
Choosing an effective drain is crucial to maintain a dry bathroom with a curbless shower design. We highly recommend linear drains because their elongated shape enables them to catch water from a wide area, ensuring efficient removal of water from the shower space. They also offer a modern aesthetic that can complement the overall look of the shower. Ensure that the drain has a good capacity to handle the flow and that you properly integrate it into the shower’s floor design.
Moreover, selecting a quality drain cover that aligns with the floor level is essential for a continuous and uninterrupted look. Opt for a cover with adequate slits or holes to prevent blockages while still being subtle enough not to distract from the shower’s aesthetics. Frequent cleaning and inspection of the drain cover will ensure it functions correctly and remains clear of debris. Additionally, considering the overall design of the bathroom floor grading towards the drain can further assist in water management.
Maintaining proper water management extends to routine checks and cleaning. Regular drainage inspections prevent clogs from forming. In terms of upkeep, a meticulously clean shower area hinders mildew growth and ensures all water flows toward the drain unimpeded. When selecting shower accessories, opt for those designed to minimize water spillage outside designated areas. Utilization of water-absorbing mats just outside the shower can also be beneficial, provided they do not become tripping hazards or damp breeding grounds for bacteria.
Installing a Shower Splash Guard
When embarking on installing a curbless shower, you’ll want each job done precisely.
Use Professional Services
- Consult Experts: Architects and/or professional bathroom designers know how to optimize a shower’s layout for aesthetics and functionality.
- Certified Installation Teams: Expert tilers and plumbers are adept at the necessary slopes and waterproofing that guarantee longevity and effective water management for a curbless shower.
Quality of Materials
- Non-porous Tiles: The less absorbent the surface material, the less likely water will seep through. Materials like porcelain or glazed tiles are good choices.
- Higher-end Sealants and Grout: Invest in quality sealants that are expressly designed for wet conditions and can resist mildew and mold.
Utilizing Curbs or Thresholds

While some designs diligently keep to a completely curbless approach, occasionally incorporating a minimal curb or threshold can offer additional protection against water egress. These can be stylishly integrated into the bathroom’s aesthetics while remaining low enough to maintain easy accessibility. However, ensure that such additions comply with applicable accessibility standards, particularly for individuals with mobility impairments who benefit most from curbless designs. Always confirm compatibility with the existing design and legal guidelines for residential construction.
Staying abreast with the latest building standards is imperative for ensuring both compliance and safety in curbless shower designs. Whether one is remodeling an old bathroom or constructing a new one, it’s advisable to routinely consult with professionals like certified inspectors who can suggest careful innovations or modifications that align with updated legal criteria. Regular professional assessments not only safeguard against legal complications but also ensure that the bathroom maintains the highest degree of safety for all users.
Using Sloped Floors
Beyond ensuring compliance with codes, employing floors that naturally guide water to drains is a savvy design choice. Surfaces need to be slip-resistant to prevent falls. Utilizing tiles with a non slip texture helps greatly with both safety and water management. Moreover, keeping an eye on consistency across the shower floor’s slope guarantees no standing water zones, which, if unchecked, can become breeding grounds for mildew or result in water stagnation.
Understanding the importance of proper shower floor sloping can’t be overstated. When planning the slope, it’s essential to achieve a balance that ensures water flows easily to the drain without creating an uncomfortably steep floor. Consider the tile size and shape when determining the slope as well; large format tiles may require a different strategy compared to smaller, mosaic-type tiles to help avoid water pooling. Always check that the finished slope is uniformly applied without dips or variations.
Ensuring proper shower floor sloping also involves taking into account the drain placement. It should be centrally located or designed to work with the floor’s gradient to facilitate quick drainage. The gradient itself must be checked for accuracy throughout the installation process any inaccuracies can lead to water accumulation. To test the slope, pour water on various spots of the shower floor and observe its flow towards the drain, making adjustments as needed before the final tile installation.
Applying Waterproofing Membrane
To properly apply the waterproofing membrane, follow the manufacturer’s instructions carefully. This usually involves preparing the surface by cleaning and priming. Next, the membrane is applied; it can be troweled on, rolled on, or installed as a sheet depending on the type. Overlap seams by the recommended distance and ensure no gaps or air bubbles are present. Lastly, inspect the membrane for any tears or inadequate coverage spots and repair them as needed to guarantee a watertight barrier.
When considering the integrity of the waterproofing membrane, routine checks are pivotal to ensure ongoing performance. It’s crucial after the membrane application that a sufficient drying or curing period is allowed before proceeding with further construction, such as tile installation. Any moisture trapped below can compromise the effectiveness of the membrane. Consult the products’ guidelines for specific curing times. Address any punctures or visible damage immediately, and repair them to maintain the integrity of the waterproof barrier.
It is also imperative to regularly inspect the drain integration within the curbless shower floor. A tight seal between the drain and the membrane helps prevent water from infiltrating the subfloor. For additional precaution, angle the shower floor slightly towards the drain to promote proper runoff. Moreover, perimeter joints, where the floor meets the walls, should be sealed tight to stop any potential water escape. Regular monitoring and repair of these critical spots are essential for managing water within the bathroom effectively.
Maintaining a Dry Bathroom with a Curbless Shower
The work isn’t over once the shower is installed. To truly keep your bathroom safe and dry, maintenance and regular checks are important.
Regular Maintenance and Cleanliness
- Grout and Sealant Check-Ups: Grout can degrade over time; therefore, regular check-ups are necessary. When needed, re-apply sealant.
- Squeegee After Use: By simply using a squeegee to gather the remaining droplets post-shower toward the drain, you can reduce moisture significantly.
- Remove Obstructions: Occasionally check that nothing obstructs the flow toward the drain, including loose hairs or small washcloths.
Adopt Water-Smart Habits
- Rethink Shower Time: Shorten the length of showers to reduce overall exposure.
- Shower Curtains: In instances where a fixed glass screen isn’t desirable or possible, a weighted shower curtain may serve as an alternative measure to curtail water.
- Observant Practices: Pay careful attention to splash patterns over time. This can highlight areas in need of adjustment or additional waterproofing strategies.
- Regular Inspections: Frequent scrutiny of the entire shower area will swiftly uncover any signs of wear and tear or leakage, allowing for prompt repairs to prevent water from spreading.
Using Water-Repellent Shower Curtains
Using water-repellent materials for shower curtains helps minimize the water that escapes the enclosure. Ensure that the curtain is appropriately sized and heavy enough to resist billowing, which can cause water spillage. Proper care, such as regular washing and airing out, is also crucial to prevent mold and mildew buildup. Additionally, consider the placement of the curtain in relation to the showerhead to further control water flow and reduce leakage onto the bathroom floor.
Further to barrier measures, regular inspections prevent cumulative water damage and spot potential issues early. Averting these issues involves inspecting for gaps or cracks where water may breach. Strive for updates to bathroom design that embrace advancements in water management technologies and materials.
Also, encourage responsible usage of the shower, which includes making sure water is completely turned off after every use and fixing any leaky fixtures immediately to maintain a dry and safe bathroom environment.
Employing Natural Stone Sealants
Natural stone tiles can offer a unique aesthetic and functional advantage in curbless showers. However, these materials often require specific sealants that enhance their resistance to water and staining. Such treatments should usually be reapplied every one to two years, depending on the frequency of shower use and the porosity of the stone. Regular resealing is vital to maintain the stone’s natural beauty and prevent water damage to the shower structure over time.
While ensuring that sealants remain effective, one should also prioritize the exact type of natural stone used, as some may require more frequent resealing. Alongside this, investing in extra durable grout and choosing fixtures resistant to corrosion or wear from hard water can further protect your curbless shower. Keeping these functions in mind, it is essential to focus on holistic bathroom safety by integrating anti-slip flooring surfaces and possibly a rail or seat for additional support and stability.
When choosing your curbless shower’s natural stone, consider frequency of use and the inherent characteristics of the stone types available. Daily used showers or stones like marble need more attention due to their porosity. Combine these aspects with a commitment to safety features. Include textured flooring to prevent slips and falls, and if necessary, install grab bars or a stable seating area within the shower to aid those with mobility issues. These proactive steps will help ensure a safe, functional, and beautiful bathroom space.
Considering Shower Mats or Rugs
Whether you’re opting for mats or rugs within your curbless shower area, it’s essential to choose products that are slip-resistant and quick to dry. Non-slip mats can significantly reduce the risk of falls, a vital consideration in any shower, but especially in curbless designs where water can disperse more freely. Quick-dry features ensure that the materials don’t remain wet, minimizing the risk of mildew or mold buildup which can be a concern in continuously moist environments.
Ensure regular ventilation to curtail humidity levels which can lead to mold growth. Turn on an exhaust fan during showers and for a short while after, or periodically open a window if weather permits. Minimize the risk of slippage by using textured tiles that provide traction underfoot. Keep in mind that proper lighting in the shower area can enhance safety by improving visibility, thus preventing accidents related to slipping or tripping over unseen obstacles.
In addition to the steps mentioned, integrating slip-resistant floor textures and maintaining effective lighting can be pivotal measures. High-quality lighting provides clear visibility, reducing potential trip hazards that might not be easily seen. Moreover, careful tile selection, favoring those with built-in texture, enhances grip and stability under wet conditions. This, in combination with the suitable choice in mats or rugs, can successfully augment the level of safety within a curbless shower environment.
Opting for a Curved Shower Rod
A curved shower rod offers a practical design solution for keeping water droplets confined within the shower area. As it arcs outward, it provides additional elbow room, which not only enhances comfort but also distances the shower curtain from the water stream. This decreases the chances of water escaping onto the floor. Plus, a curved rod can act as a visual boundary, intuitively guiding the user to remain centered in the shower space away from the edges.
Despite the simplicity of a curved rod, it makes a significant difference in water retention. Users naturally stay within its curve, reducing splashes. It is an affordable upgrade that significantly improves water management in curbless shower setups. Ensure its installation is sturdy to handle the stress of frequent movements and changes in curtain weight due to water. Regular inspections are crucial to maintaining its security and effectiveness in minimizing water escape.
Regular compliance checks with updated building codes boost safety for all bathroom users by ensuring environmental suitability. It is wise to periodically consult with a professional to verify that your curbless shower still adheres to all relevant regulations, especially after you’ve made alterations or upgrades over time. Moreover, engaging routinely with inspectors ensures that every aspect of your setup—from sloping floors to the seals around glass partitions affords maximum protection against water damage outside the shower area.
You can see also this post, What to Put Between Two Mirrors in Bathroom
Conclusion
Designing a curbless shower is a fantastic way to create a stylish and accessible bathroom space. However, ensuring that water remains within the shower area is a crucial consideration. By selecting the right shower drain, installing splash guards, utilizing curbs or thresholds, sloping the floor correctly, and applying waterproofing measures, you can prevent water leakage effectively. Regular maintenance and inspections, along with water-repellent curtains, stone sealants, shower mats, and curved rods, will further contribute to a dry and secure curbless shower experience.
FAQs
Curbless showers are highly suitable for older individuals as they eliminate the need to step over a high threshold, reducing the risk of tripping and ensuring easy access.
Yes, curbless showers are an excellent space-saving option for small bathrooms as they create a seamless and open design, making the area feel more spacious.
While some experienced DIYers may be able to install a curbless shower, it is recommended to seek professional assistance to ensure proper installation and water-tightness.
Absolutely! Incorporating decorative tiles in your curbless shower can enhance its visual appeal and add a personal touch to the overall design.
The frequency of reapplying the waterproofing membrane depends on the product and usage. It’s best to follow the manufacturer’s guidelines and consult with a professional if needed.

Leave a Reply