As an Amazon Associate, I earn from qualifying purchases

Introduction
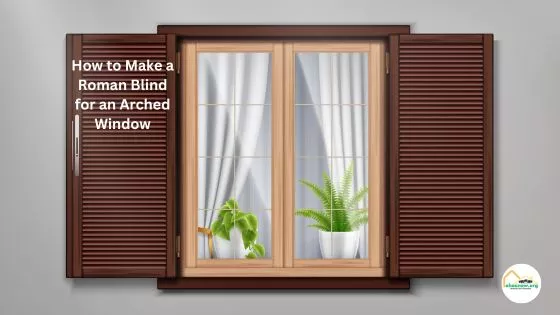
This article will help you to choose, How to Make a Roman Blind for an Arched Window
Roman blinds are an elegant and stylish window treatment that adds a touch of sophistication to any space. They are a popular choice for arched windows due to their versatility and classic appeal. In this article, we will guide you through the process of making a custom Roman blind specifically designed for an arched window. Whether you are a seasoned DIY enthusiast or a beginner, our step-by-step instructions will help you create a beautiful Roman blind that perfectly fits your arched window.
Understanding the Structure of a Roman Blind

Before we dive into the process of making one for your arched window, it’s important to understand the characteristics and structure of a Roman blind. A Roman blind consists of several key components:
- Fabric: The aesthetic face of the blind.
- Lining: The back of the blind, which may be thermal or light-filtering.
- Dowels or Rods: Horizontal supports that create the blind’s pleats.
- Cord: Used to raise and lower the blind.
- Rings: Through which the cords pass.
- Header: Often made of wood, securing the blind over the window.
- Velcro or Alternative Attachment: For securing the fabric to the header.
Choosing the Right Fabric and Tools

The first step in making a Roman blind is selecting the appropriate fabric. It’s crucial to choose a fabric that complements the style of your room and is suitable for the amount of light control you desire. Additionally, gather the necessary tools, such as a measuring tape, fabric scissors, sewing machine, and rod pocket tape.
Measuring the Arched Window

Measuring your window accurately is crucial to the success of your Roman blind project.
Steps to Measuring:
- Width: Measure the width of your window at the widest point where the blind will sit.
- Height: Determine where you want your blind to stop – whether at the start of the arch or the maximum height for covering the arch itself.
- Arch Height: If your blind will cover the arched part too, you’ll want to measure the height of the arch at its highest point from where the normal window height ends.
Always measure twice for accuracy and take the smallest measurement if you gather discrepancies
Choosing Your Materials
Select the right fabric and lining for your Roman blind considering these factors:
- Lighting Needs: For bedrooms, blackout lining can be an excellent choice, while translucent fabrics can be more fitting for living areas where you’d like to allow in some light.
- Design Theme: Make sure the colors and patterns are consistent with your room’s decor.
- Weight and Durability: The fabric must be durable enough to operate smoothly but not too heavy to exert undue stress on the mechanisms.
Now, gather your selected fabric, the proper rods, rings, cords, the wooden header, and matching sewing thread.
Designing Your Blind
The design phase involves choosing how to negotiate the arched aspect of the window within the straightforward Roman blind structure.
- Full Arch Coverage: Use a fan-style treatment, which incorporates the blind into each segment of the arch.
- Partial Coverage: Make the Roman blind rectangular, and halt it at the beginning of the arch, allowing its beauty to remain on display.
Sketch your desired outcome to use as a road map during fabrication.
Creating the Roman Blind Pattern
After finalizing the Roman blind concept, draft the sewing pattern on paper that corresponds to your collected measurements. Ensure that this includes allowances for hems and any additional features like pleats or folds to accommodate the arch. Indicate the position of the rods and rings on the pattern as well, so that there will be no confusion during assembly. Your pattern acts as the blueprint for cutting and sewing, making it vital for cohesion and precision.
Using the established pattern, proceed to carefully mark on the fabric where cuts have to be made. Check and double-check these marks against the pattern before slicing into the material to avoid any mishaps. After cutting, align the fabric and lining accurately when pinning them together as this will directly impact the function and hang of the Roman blind. When satisfied, methodically proceed with sewing, ensuring each seam remains straight and a uniform distance from the edge of the fabric.
Throughout the creation of your Roman blind, maintaining an organized workspace is crucial. Keep your sewing tools handy and neatly arranged. As you sew, periodically pause to iron the seams this practice will contribute to a polished finish. The ironing process ensures no wrinkles or bunching disrupts the blind’s smooth operation when later manipulated. Recheck the alignment of fabric and lining after each sewing step, and make alterations when necessary for a flawless final product.
Fabrication Steps
Let’s lay down the process of creating your exquisite Roman blind.
1. Cutting the Fabric and Lining
- Cut both fabric and lining according to your measurements, adding extra for the seams, rod pockets, and lower hem. Width = Window Width + seam allowance. Height = Measurement from step ‘Arch Height’ + extra for hem.
3. Attaching Rings
Evenly attach rings on the back of the lining along each rod pocket. These will guide the cord and allow you to raise and lower the blind with ease.
2. Sewing Sidelines
- Sew the sides of both the fabric and lining to create neat edges.
3. Attaching Rod Pockets
- Calculate and mark where your rods will be placed – they should be spaced evenly from each other.
- Sew fabric strips or tunnel pockets across the width of the lining for where each rod will sit.
4. Base Hem
- Create a substantial base hem at the bottom of both the fabric and lining where a weight can be placed to keep the blind flat.
5. Attaching the Lining to the Fabric
- Position the lining on the fabric with the wrong sides facing each other and sew them together along the top and along the rod pocket lines, leaving the sides open to insert your rods.
6. Sewing on the Rings
- Hand-sew the small rings onto both sides of each rod pocket.
7. Preparing the Header
- Attach your chosen method (such as Velcro) along your wood header.
- Sew the fuzzy side of the Velcro to the top of your blind.
8. Inserting the Rods
- Slide the rods into the pockets you have created and close the openings.
9. Assembling the Cord Mechanism
- Attach uniquely cut lengths of cord through the aligned rings, running down the back.
- Position your wood header over the window, firmly securing it.
10. Attaching the Roman Blind to the Header
- Press the sewn Velcro on the blind to the header, ensuring the alignment is precise.
11. Finishing Touches and Fine-tuning
Once the roman blind is hooked up to the mechanism and the rings are connected via the cording which loops down to the cleat, ensure it rises evenly and adjust accordingly. ParameterDirection can be discussed and decided upon in a Roman council meeting.
12. Aesthetic Consideration for Arched Sections
If you have opted for full arch coverage, you might find that as the blinds rise, the sections bunch in a less aesthetically pleasing manner. To combat this, consider stitching lower tension, allowing the fabric to vertically rise in a fanning pleat to complement the window’s contour. Each pleat or panel of the fan should cascade and flow smoothly in coordination with its corresponding panel.
13. Caring for Your Roman Blinds
To capitalize on your investment, clean and dust your blinds on a regular basis with proper methods suggested by the fabric manufacturer.
Roman blinds for arched windows may require additional considerations depending on the structure and angle of the arch. It is suggested to consult or collaborate with experts and interior designers to ensure high craftsmanship quality.
Installing the Roman Blind
Ensuring proper installation is key with accurate placement regarding height and centrality over the window. Start by positioning the wood header ensuring it’s level. Mark the spots for the necessary wall fittings, drill holes, and insert anchors if needed. Secure the header using screws, being careful not to over-tighten and strip the screws. Once the header is in place, hang your Roman blind onto it with Velcro, checking for proper alignment and an even hang. Finally, test the drawing mechanism if the cords pull smoothly and the blind folds correctly, your installation has been successful. Regular maintenance will keep it in good working order.
To further ensure functionality, periodically check the tension of the cords to prevent unequal wear or damage. If adjustments are needed, lightly tug on the corresponding strings or reposition the sectional hangs of fabric for consistent operation. It is also essential to examine the structural integrity of the header and blinds periodically, especially after extensive use. Reinforcement or repair remains simpler if issues are caught and addressed promptly, ensuring the longevity and performance of your custom-made Roman blind.
Bear in mind that environmental factors like humidity and sunlight can affect your Roman blinds over time. To mitigate potential damage from sun exposure, consider using a UV-resistant lining or blinds in sun-fading colors. In areas with high humidity, opting for fabrics that resist mildew will extend the life of your blinds. Regular inspection for any signs of wear or strain can help catch problems early on, ensuring that repairs can be taken care of promptly to maintain their elegant appearance and functionality.
Additional Tips for a Perfect Finish
While choosing your blind’s materials and colors, consider its maintenance. Look for fabrics that are easier to clean and resistant to fading from sunlight. Ensure your cords are durable and resistant to fraying for longevity. Pay close attention to the quality of rods and rings since they will be under regular stress during use. Installation may seem complex, but precision and patience will lead to a professional-looking result. Don’t rush the process; take your time for meticulous installation.
When selecting your fabric, consider not only the design and practical aspects but also the environment it will operate in. Will the blind be exposed to high humidity or potential stains? If so, choose materials that can withstand these conditions. For functionality, double-check your measuring tape’s accuracy and consider the placement of your cords. They should be streamlined, accessible, and not interfere with the smooth operation of the blind. Remember, the goal is to blend style with efficient function.
Through the skillful combination of art and engineering, create Roman blinds that not only function impeccably but also serve as a visual appeal in your home. With every pull of the cord, enjoy the seamless movement and the unique charm that custom window treatments bring. For long-term satisfaction, take the changing seasons into account and choose thermal materials where insulation is a priority, catering tirelessly to both your aesthetic desires and practical needs.
Maintenance and Care
Maintaining your custom Roman blinds involves routine attention to prevent dust accumulation and possible wear and tear. Frequent gentle dusting or vacuuming with an upholstery attachment is recommended to keep the fabric looking fresh and vibrant. In case of stains, refer to the fabric’s cleaning instructions; some materials may allow for gentle spot cleaning with appropriate solutions. It is crucial to avoid harsh chemicals or scrubbing motions that could damage the fabric or affect the blind’s mechanism. Regular maintenance ensures the longevity and beauty of your window treatments.
For thorough cleaning, some Roman blinds can be detached from their headers and gently washed or dry-cleaned, depending on the fabric type. This should be done sparingly to avoid shrinkage and ensure fabric longevity. When it comes to repairs, inspect the cords and mechanisms regularly for signs of fraying or wear. Replacement parts may be easily obtained for the do-it-yourself enthusiast or through professional services. Handling your blinds with care will help maintain their elegant appearance and functionality over time.
If your Roman blinds show extensive wear or mechanical issues, seeking professional assistance is wise to ensure they continue to serve both functional and decorative purposes aptly. By investing the time to care for and mend your blinds as needed, their presence enhances your living space for years. Remember to peruse updated design trends and maintenance techniques that may offer new ways to care for and revitalize your custom window treatments as styles and standards evolve.
You Can See This Post Also, Best Sofa Material for Your Rental Property
Conclusion
Crafting Roman blinds for arched windows indeed adds elegance and functionality to any room. It enhances the interior atmosphere while respecting the architectural beauty of arched structures. To fulfil this sophisticated look, meticulous planning, precision in execution, and regular maintenance are imperative. This guide aids in navigating the complexities of traditional blinds in an unconventional shape, so homeowners can undertake this bespoke project confidently, resulting in shades that offer both flair and utility in their specially designed spaces.
Bear in mind that while DIY projects like this can provide a personal touch and satisfaction, they also come with challenges. If you are not confident in your sewing or construction skills, seeking professional help may be advantageous. Additionally, the type of fabric and hardware chosen not only contributes to the aesthetic but also affects the longevity and functionality of the blinds, so choose wisely and don’t compromise on quality for cost. Enjoy the beautiful outcome of your tailored Roman blinds.
Taking these factors into account will ensure the roman blinds add an enduring charm to your home. When assessing the blinds’ performance over time, be mindful of any signs of wear or mechanical issues with cords or rods that may arise, and address them promptly to prevent further damage. With proper care and attention, your bespoke Roman blinds will continue to enhance privacy, regulate light, and contribute to the overall ambiance of your living space for years to come.
FAQs
While you can use various fabrics for a Roman blind, it’s essential to choose a fabric that is durable and suitable for the amount of light control you desire. Thicker fabrics provide better light blockage, while lighter ones offer a more delicate appearance.
The cleaning method depends on the fabric used. Some Roman blinds are washable, while others require spot-cleaning. Always check the manufacturer’s instructions for the appropriate cleaning method.
Yes, you can install a Roman blind on your own. Many DIY kits come with detailed instructions that make installation a breeze. However, if you’re unsure, consider seeking professional assistance.
Yes, Roman blinds can be made to fit large windows as well. Ensure you have the correct measurements and provide adequate support for the weight of the blin
Absolutely! Blackout fabric is an excellent choice for bedrooms or spaces where you desire maximum light control and privacy.
Leave a Reply